a maker studio
Solder & Sparkles
By Honey Chawla — where circuits meet crafts.
Cyberdecks, custom PCBs, 3D prints, handmade jewelry with a heartbeat, and whatever else the parts bin dreams up.
Step one — picking parts from the bin — is done, and every choice has a reason:
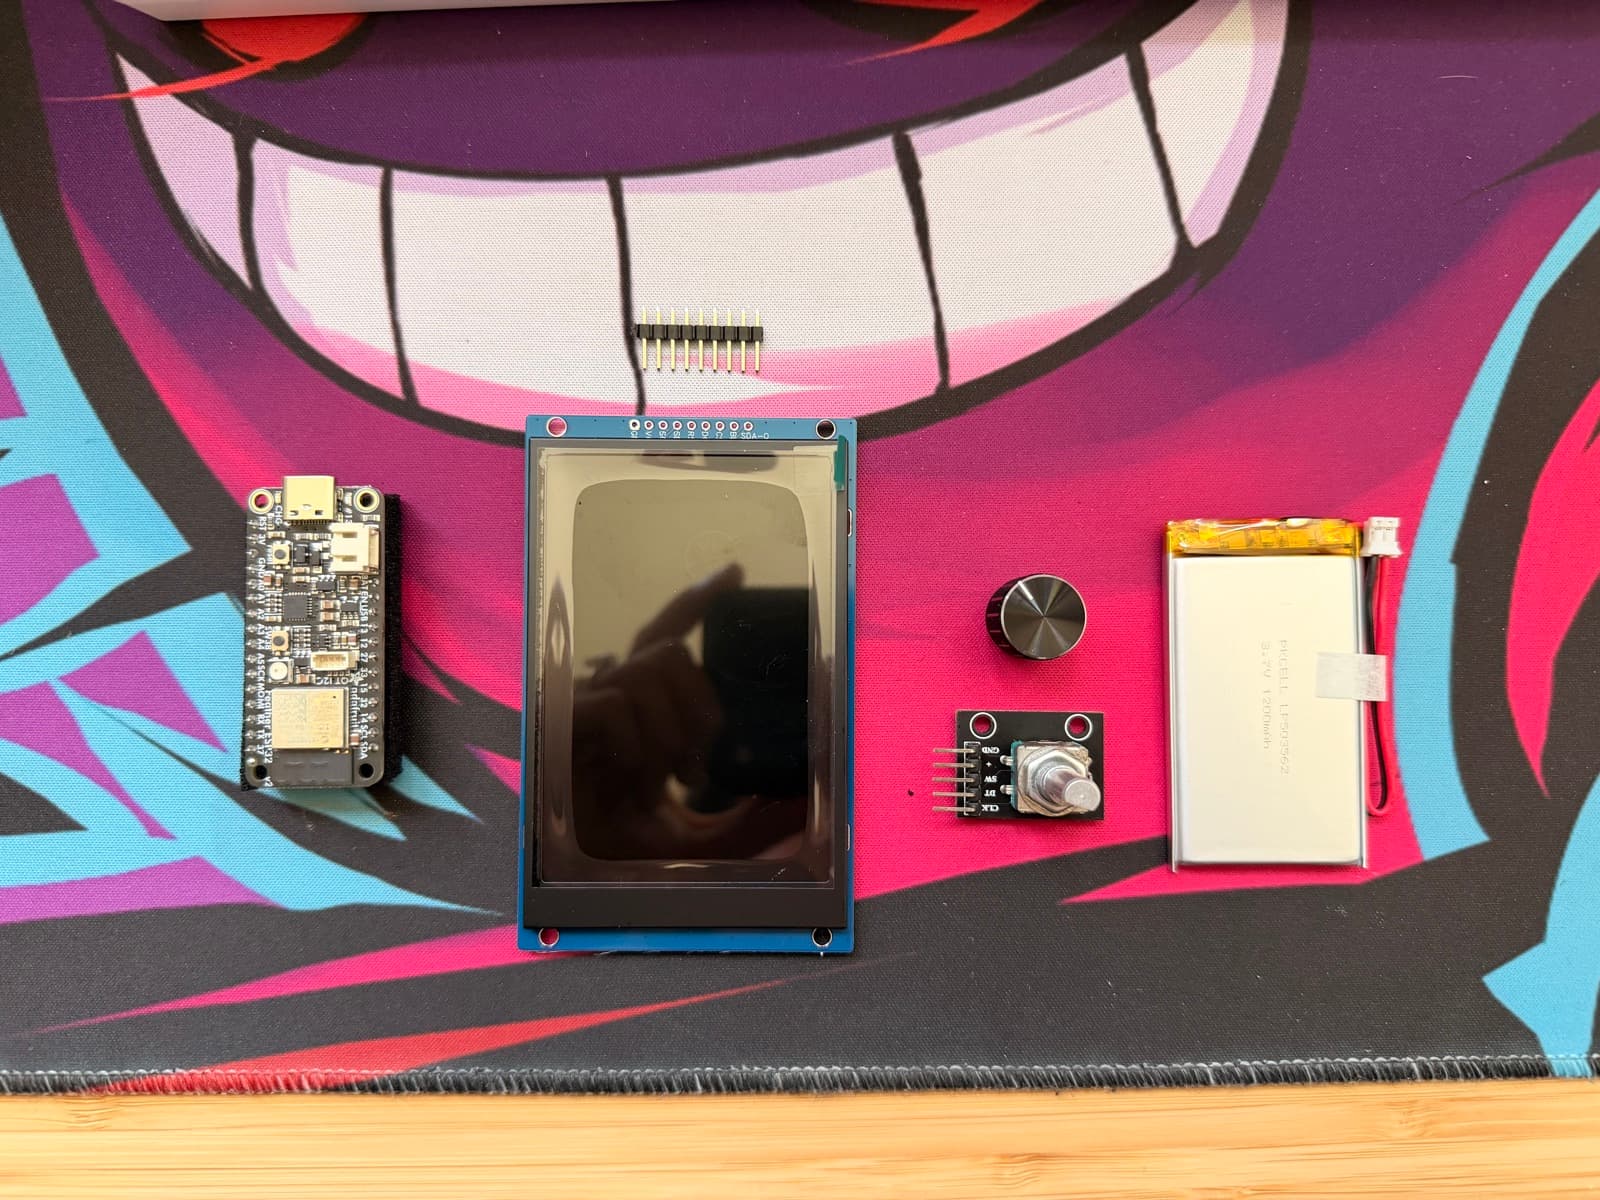
- Brain: ESP32 Feather V2 — it has LiPo charging built right in, so battery management is solved by plugging in a connector. 8MB of flash means several novels' worth of fic fit on board.
- Screen: the 3.5" TFT (320×480) — the biggest screen in the bin. Big SPI displays redraw slowly, which rules them out for games — but a page of text is static, so the e-reader is the one build where that weakness doesn't matter.
- Page turns: the rotary encoder — spin forward for next page, back for previous, click for the menu. The entire UI is one knob.
- Power: the 3.7V 1200mAh battery — straight into the Feather's battery connector. No regulators, no extra boards.
- Firmware: CircuitPython — the board joins WiFi and serves its own little file manager in the browser, so loading a fic is wireless: download, drop, read. No apps, no cables at all.
Step 2: prototyping ⚡
First signs of life! We flashed the classic blink example onto the Feather from the Arduino IDE. One tiny red LED, blinking once per second — which doesn't sound like much, but it proves the whole pipeline works: the cable, the board, the toolchain, the flash. In hardware, the humble blink is the "hello world."
Then we took a detour through CircuitPython — Python on hardware, live REPL, very appealing on paper. But on this particular board it wanted WiFi configured before it would even take a file, the editor couldn't find the device, and the tooling fought us at every step. Lesson logged, mistakes and all: the boring write-compile-flash Arduino flow just works, so boring wins. Back to Arduino IDE we go.
Then the soldering iron came out — for the first time ever. The display's pin header needed attaching: nine little joints, with the breadboard holding everything straight as a jig. Lead-free solder, steady hands, zero bridges.
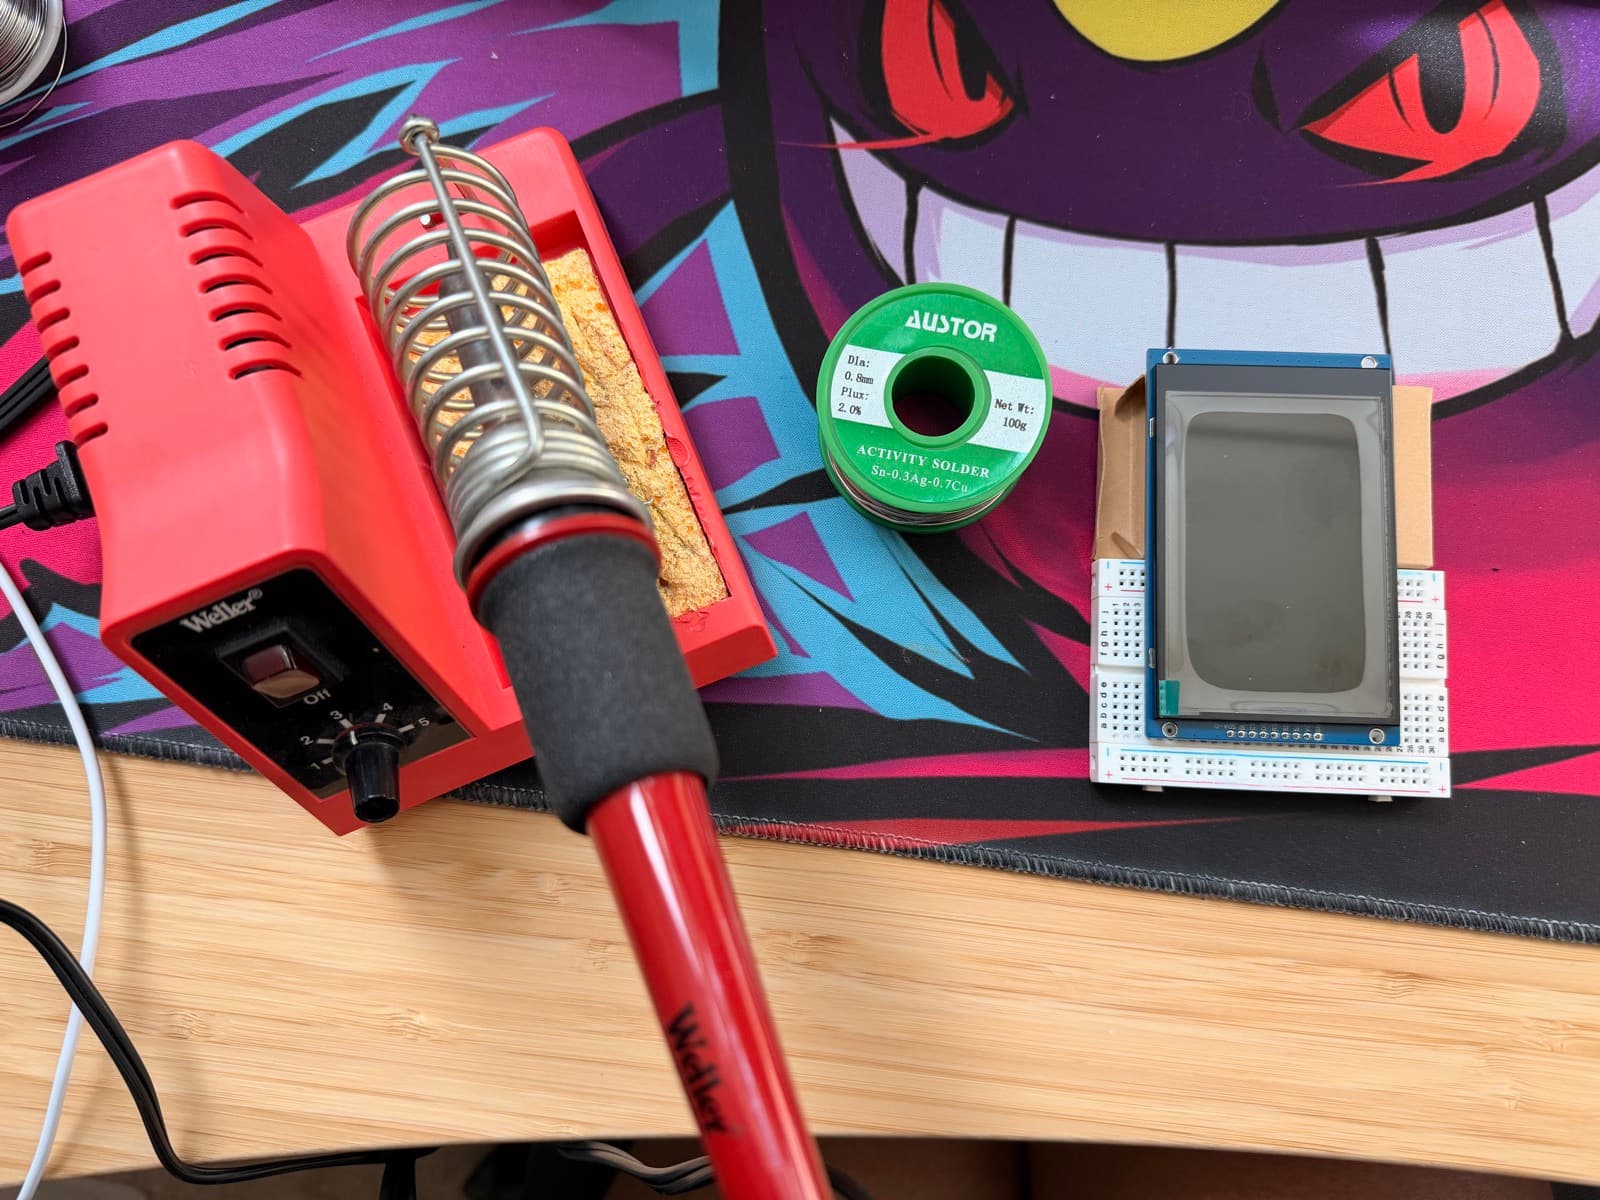
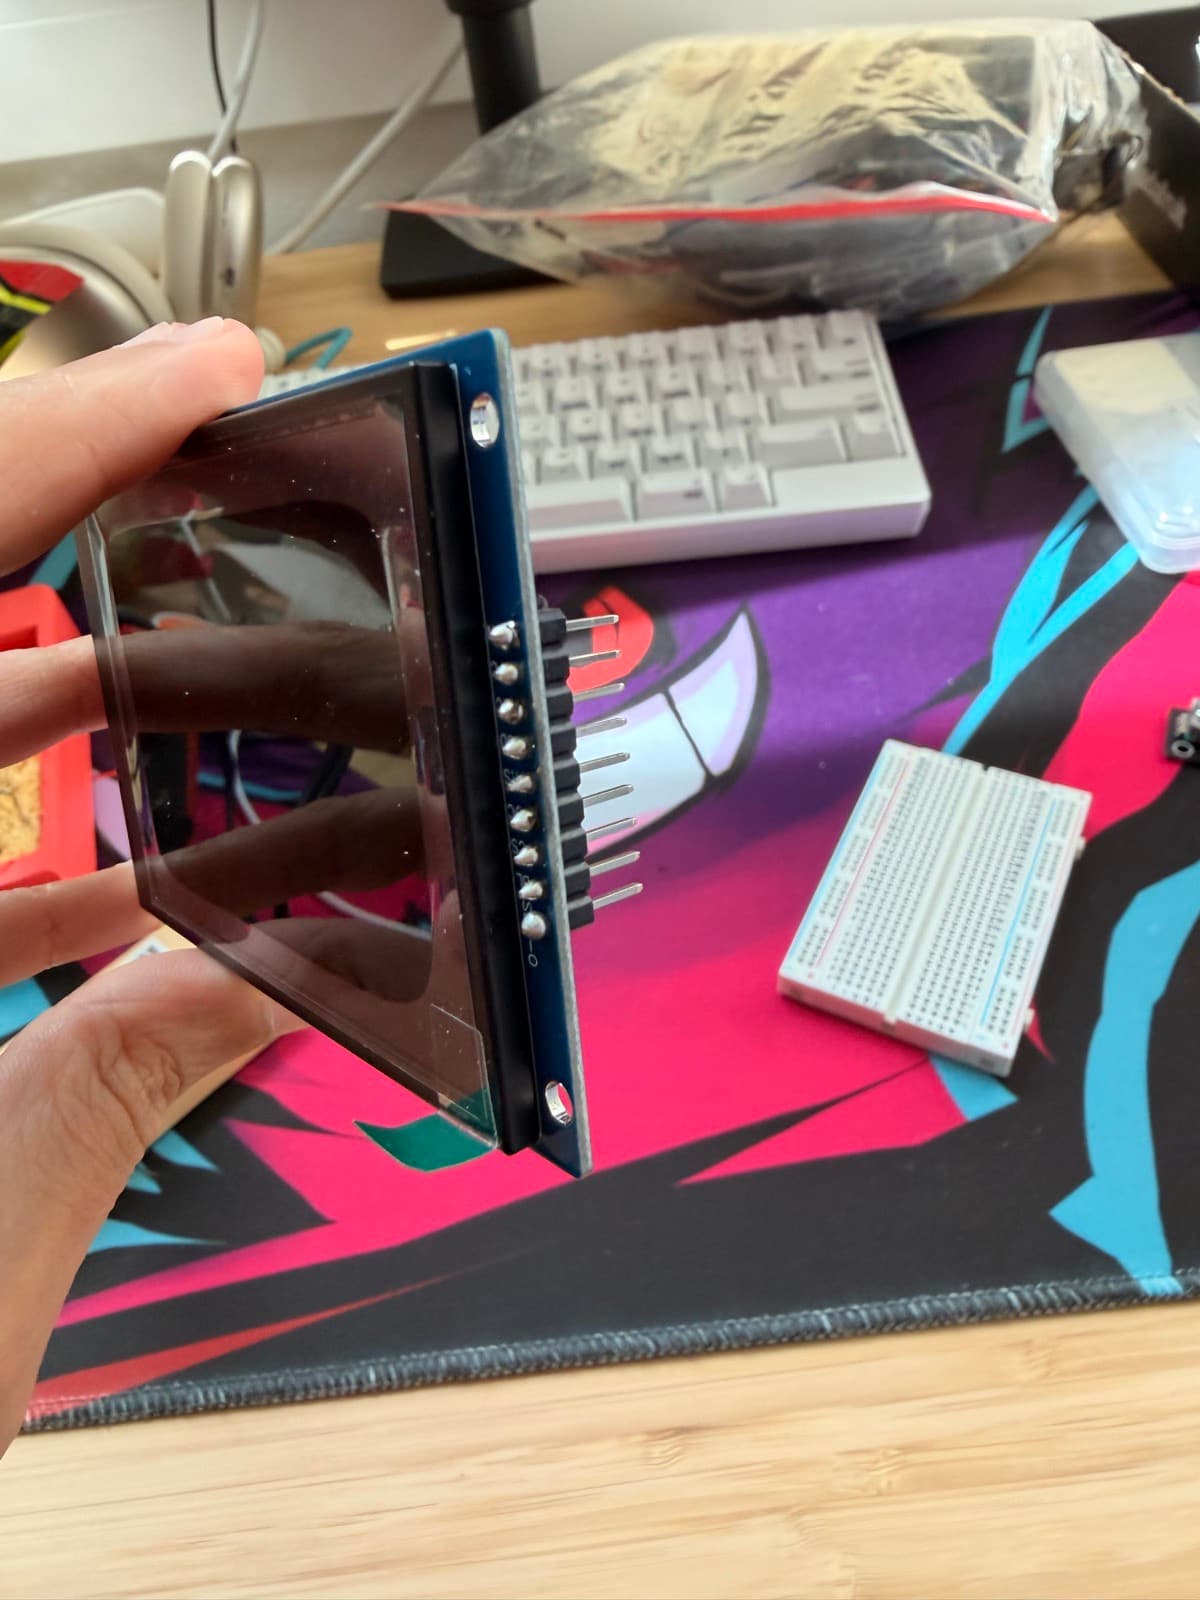
Nine jumper wires later, the display was wired to the Feather. We asked it politely which driver chip it has (displays are supposed to answer over SPI) — it returned gibberish and kept its secrets. So we guessed: ILI9488, the most likely brain for a 3.5" screen like this, and flashed a test sketch…
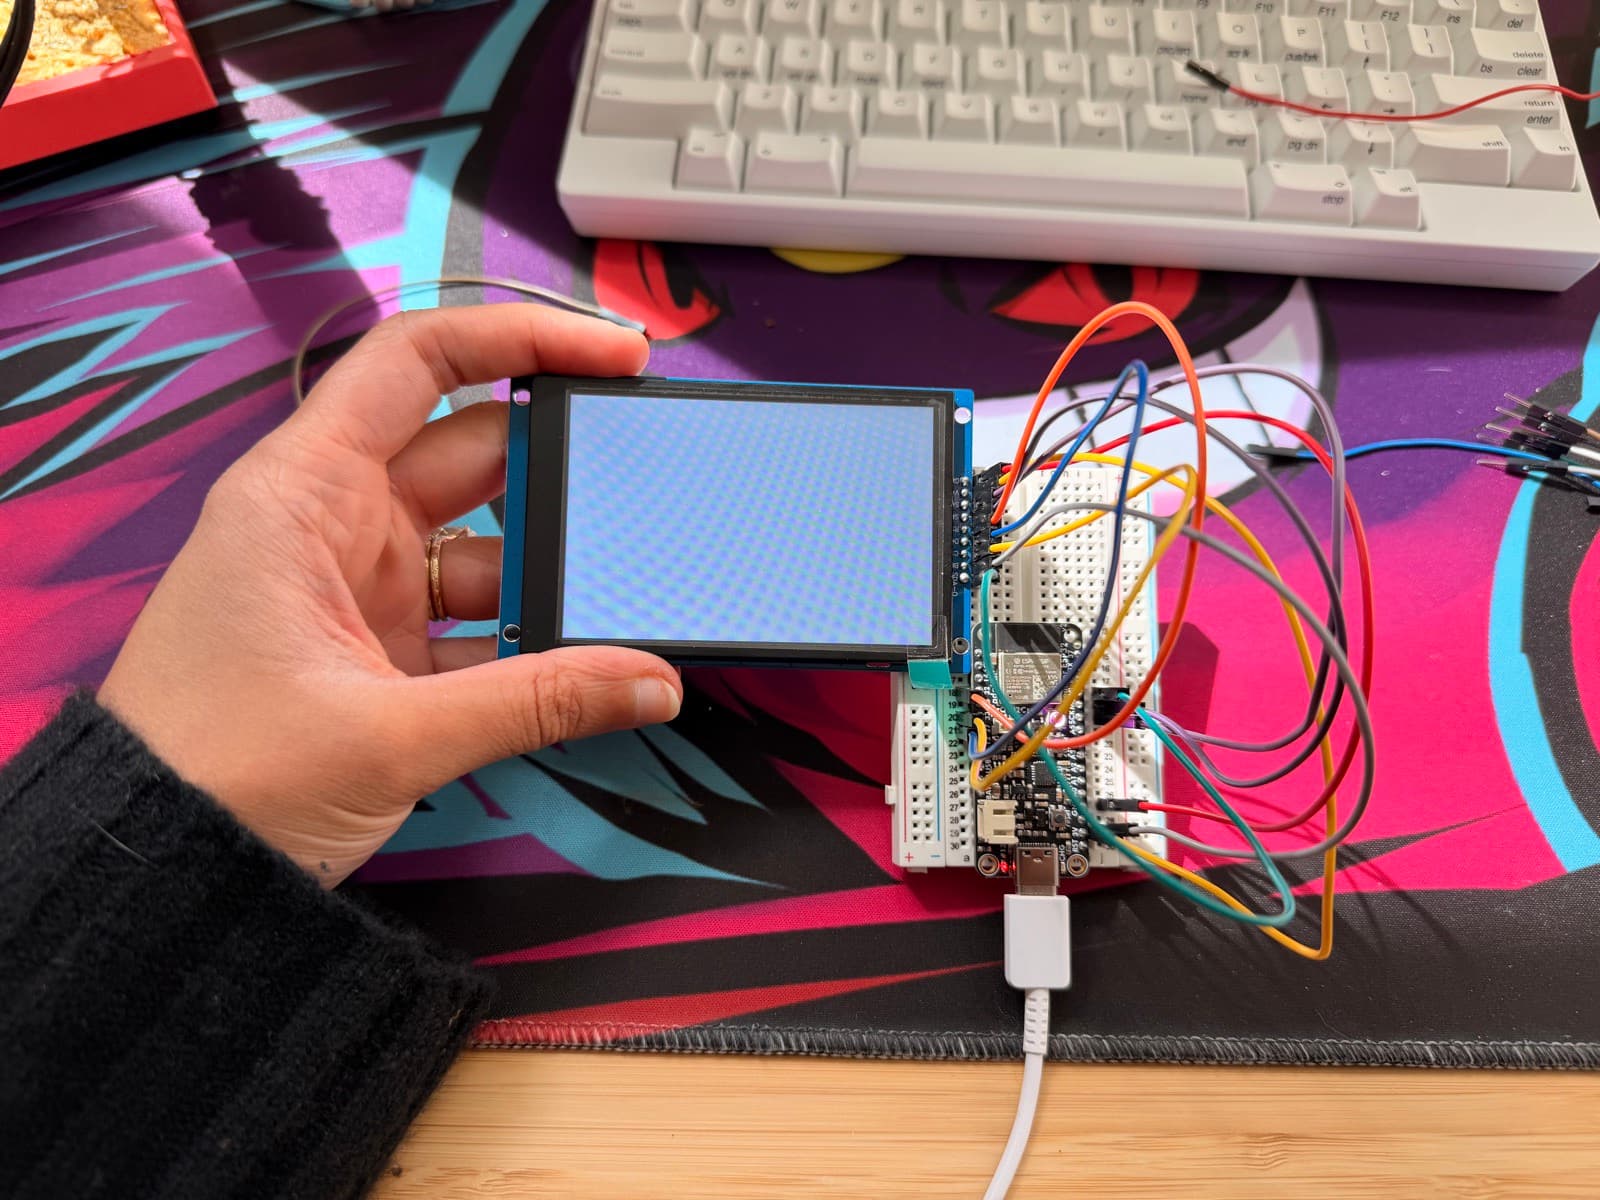
…and it worked on the first try:
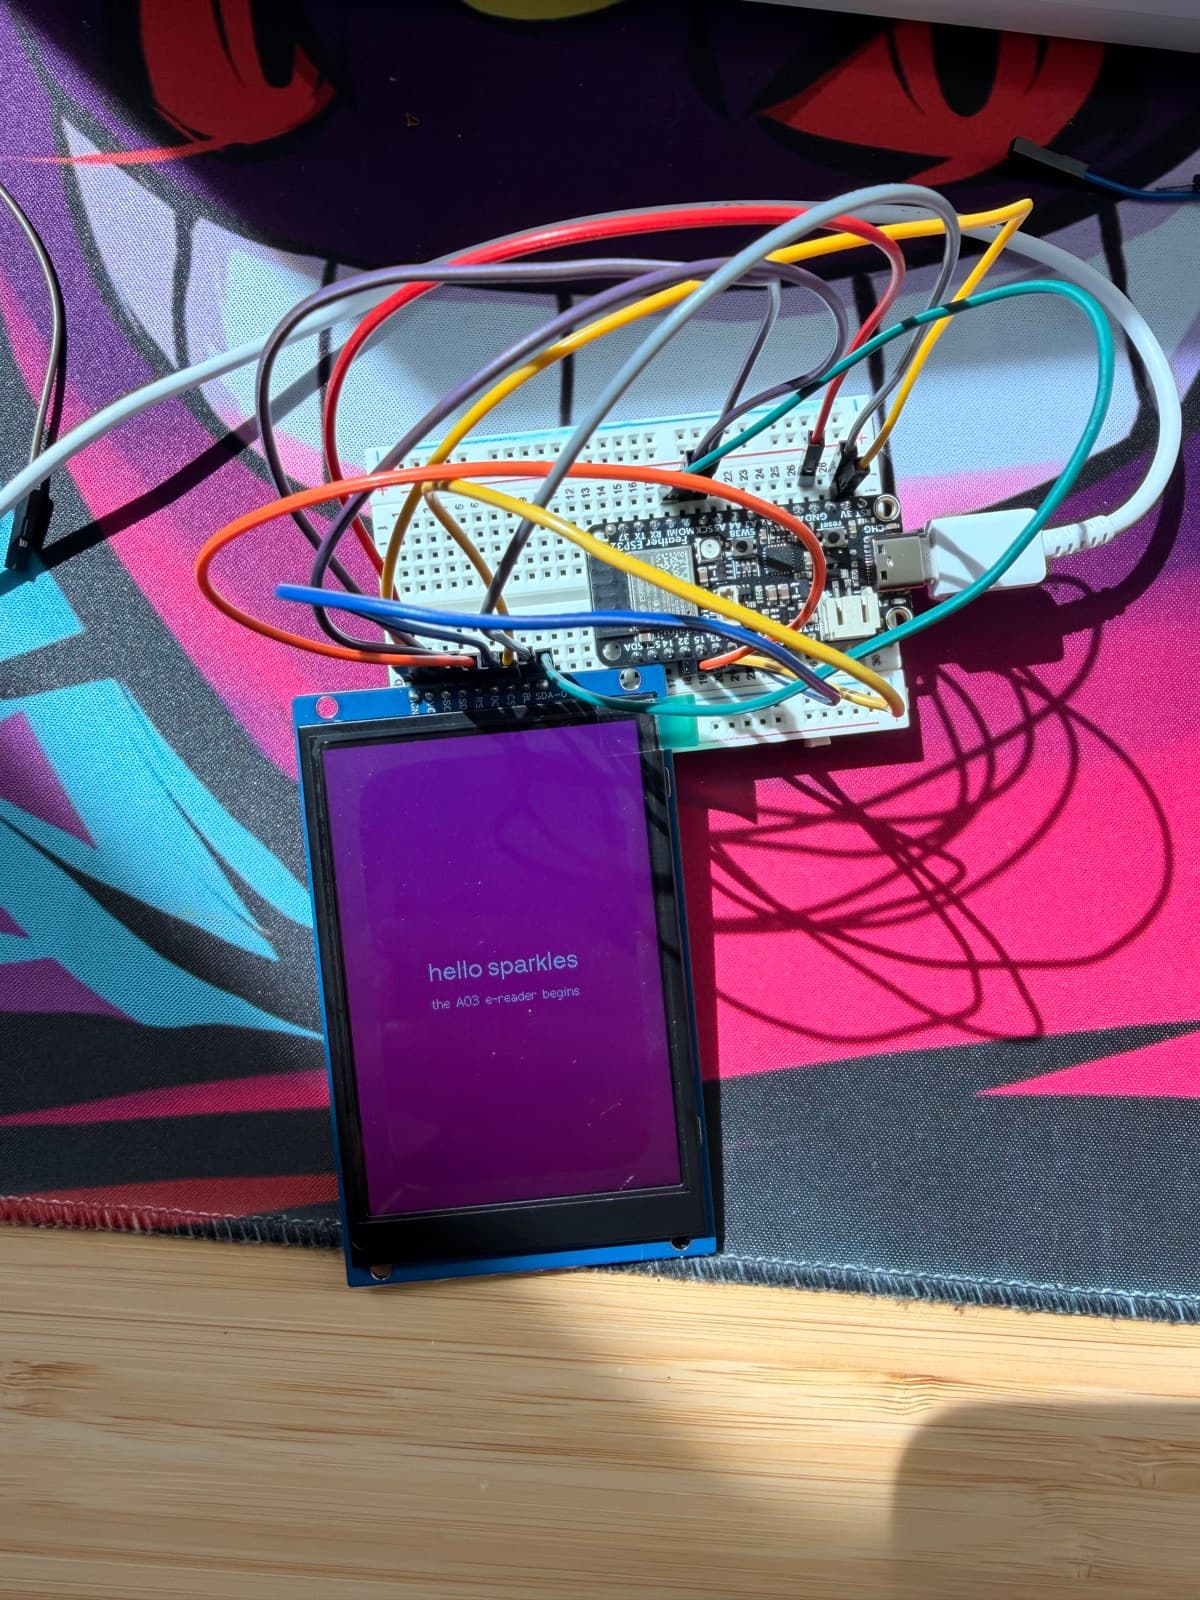
Update: the rotary encoder is in! Spin the knob and pages turn on screen; click it and the color scheme flips. The e-reader's entire input system is officially one very satisfying knob.
And then, the big one: a real fic on the real screen. "The Auction" — a 1.8MB Dramione epic — is flashed into the board's storage, and the reader does word wrap, pagination, a page counter, dark mode, and remembers your page across power-offs. (The pink is properly pink now, too — the panel wanted its colors in the other order.)
One last dragon to slay: the first version took minutes to load, because it paginated the novel one character at a time through the filesystem. Version two slurps the whole fic into the board's 2MB of PSRAM in one go and wraps text with pure integer math. Boot time: a few seconds. Lesson logged: the filesystem is for storing, RAM is for reading.
Step 2: prototyping — done. It boots in seconds, holds a novel, turns pages with a knob, has a dark mode, and remembers where you stopped. That's not a prototype of an e-reader. That's an e-reader.
Step 3: make it cute 🎀
Goal: a real PCB so the jumper-wire nest becomes a proper board, and a case so the breadboard becomes a gadget. This is where the two big skill goals (PCB design and 3D printing) come due — and the first one just got paid. In a single evening, in KiCad (chosen over the AI-assisted tools on purpose: the whole point is learning to read the schematic myself), the e-reader's circuit went from breadboard to finished board design.
The best catch of the night wasn't on the screen: halfway through layout I realized the encoder's shaft would stab the display in the back — CAD happily approves designs that are impossible in three dimensions. So the board grew a 20mm "control deck" below the display where the knob gets open air, which accidentally made it look like… an e-reader. Screen up top, wheel under your thumb.
Then: routing. Fat traces for power hugging the board edges, a six-lane signal fan feeding the display connector, a ground pour flooding the entire back with copper — and the design rule check came back with zero violations and zero warnings, first try. The back of the board is signed, because you sign your work.
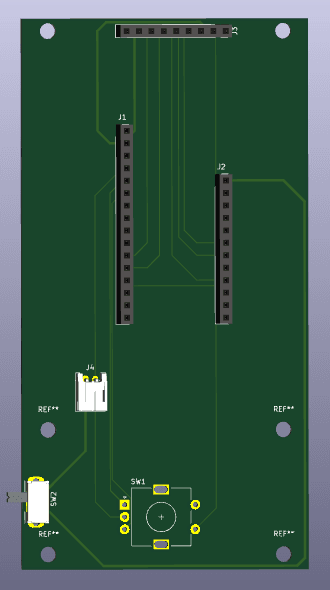
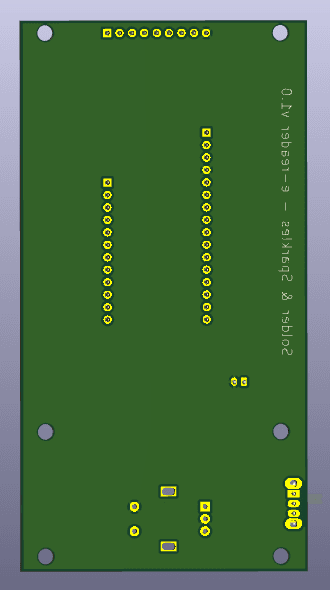
Update: the order is placed. Five copies of a board I designed are being manufactured right now — 58.7 × 120.4mm of fiberglass, copper, and signature. (One last catch before ordering: holding the real display against the layout revealed the bottom mounting holes needed to move — the board got a little taller. Verify against atoms, not just pixels.) While the fab works: the case gets designed, and the breadboard prepares for honorable retirement.
The iPod Classic was peak gadget: one device, one job, one extremely satisfying wheel. So we're building it back — genuine iPod Video housings and clickwheels from the parts market, modern guts inside, Bluetooth and the original headphone jack. Inspired by the legendary sPot build, which proved the clickwheel's secret language has already been decoded.
Phase 1 is collecting the parts, and the cast is fully chosen:
- Brain: ESP32 Feather V2 — the same beloved board as the e-reader, picked here for a rarer talent: it's the generation that still speaks Bluetooth Classic, which streaming to headphones requires. USB-C charging built in.
- Shell: real iPod Video parts — white faceplate, chrome thick back, genuine clickwheel with its ribbon, and the original headphone-jack-and-hold-switch assembly. The hold switch will actually work. Authenticity matters.
- Display: 2.4" TFT (320×240) — almost exactly the size and resolution of the original iPod Video screen, so it drops behind the window like it was born there. Bonus: its SD card slot doubles as the music library.
- Storage: 32GB microSD — roughly 7,000 songs. The 2005 dream, casually exceeded by a fingernail.
- Power: 3.7V 2000mAh battery — 13–20 hours of playback, charged over USB-C. No power switch, on purpose: real iPods slept, so ours deep-sleeps too.
- Audio: PCM5102A DAC — turns bits into music for the wired jack; Bluetooth handles the wireless side.
Everything is ordered and in the mail. Phase 2: breadboard the audio chain, teach the Feather to read a clickwheel, and hear the first song. Somewhere down the road, this project's jumper nest becomes our first custom PCB — a board shaped to fit an iPod.
The approach is materials-first: gather the parts, then let the parts bin tell us what wants to be built — the idea board below is where the candidates are fighting it out.
Along the way: learning to 3D print and to design a real PCB — so the finished build gets an enclosure that looks intentional and a board that isn't a bird's nest of jumper wires.
The Parts Bin
Shared across every project — whatever gets built draws from here.
Brains
- ESP32-S3
- ESP32-CAM
- XIAO-ESP32-C6 ×2
- ESP32 Feather V2 ×2
Displays
- 1.28" round GC9A01
- 1.28" round TFT 240×240
- 2.8" TFT SPI 240×320
- 2.8" resistive touch 240×320
- 3.5" TFT 320×480
- 3.5" RPi display 480×320
Power
- 3.7V 1500mAh LiPo
- 3.7V 1200mAh Li-ion
- LM2596 step-down regulator
- Micro-LiPo charger
Inputs
- Micro switches ×5
- Rotary encoder
- Joysticks ×3
- Colorful square buttons ×15
- Power switch
Bits
- Half-size breadboard
- FeatherWing Proto ×2
- NeoPixel ring 16× RGB
- 18-pin 100mm FPC cable
The Toolbox
The machines that make the making happen.
- soldering iron 🔥
- 3D printer 🖨️
The Idea Board
Things the parts bin could become — each one test-fitted against what's actually in the bin.
The Compowder
A Totally Spies-style flip compact — round screen as the "mirror," glowing NeoPixel bezel, spy boot animation.
would use
- ESP32 Feather V2
- round TFT 240×240
- NeoPixel ring
- FeatherWing Proto
- 1200mAh Li-ion
Pokédex
The classic red clamshell. Point the camera at something and get a Dexter-style entry for it.
would use
- ESP32-CAM
- 3.5" TFT 320×480
- joystick
- micro switches
- 1500mAh LiPo
Yu-Gi-Oh LP counter
Dial in damage on the encoder, watch life points drain dramatically. Duel disk shell as the stretch goal.
would use
- XIAO-ESP32-C6
- round GC9A01
- rotary encoder
- square buttons
Heart macropad
A heart-shaped mini keyboard — the classic first custom PCB. Pink solder mask, obviously.
would use
- XIAO-ESP32-C6
- square buttons
Card scanner
A little tray that looks up prices and details for Pokémon and Yu-Gi-Oh cards.
would use
- ESP32-CAM
- 3.5" RPi display
Digital locket
The round display as a necklace: animated hearts, tiny photos, a sprite that blinks at people.
would use
- XIAO-ESP32-C6
- round GC9A01
- 1200mAh Li-ion